Scenario 1: The App-V 4.6 Client is already installed on the reference machine and then captured as image for OS deployment. However, the publishing server of the App-V 4.6 Client is not configured.

Next, advertise the task sequence to perform the OS deployment. The publishing server should be configured succesfully after the deployment is finished.
Scenario 2: The OS image used for the deployment is not installed with App-V 4.6 Client.
Since the App-V 4.6 Client is not installed in the OS image, “install new software” variable is needed to add in to the task sequence. Before that, a new package for the App-V 4.6 Client is needed. Add a new package by following the steps below.
Please copy the App-V 4.6 Client setup folder to a shared network path first!


Set the source directory to the App-V 4.6 Client setup folder.
After Data Source, click all the way next until finish.


Before proceed to the next step, please copy the Microsoft Application Virtualization Client folder under “C:\Program Files\ Microsoft Application Virtualization Client” on a client machine with App-V 4.6 Client installed. And put in under shared network path.


Remember to set the distribution point, and this package doesn’t need to add a new program.

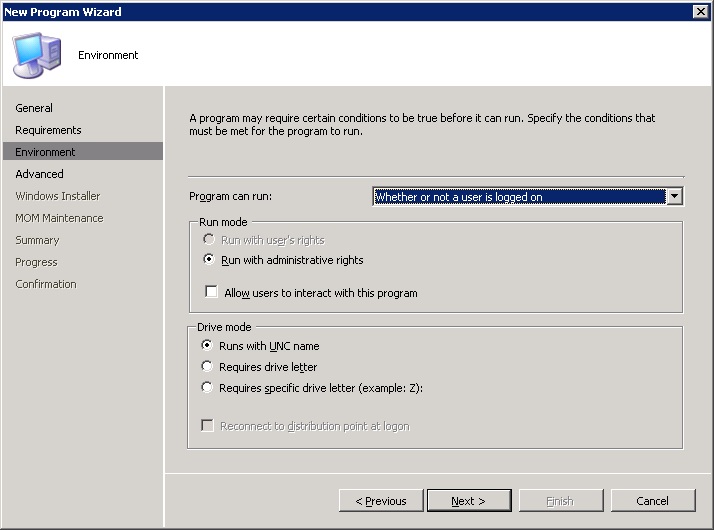
Insert the “Install New Software” variable and rename the task. And then, browse to the first package created.

Insert the “Run Command Line” variable and rename the task. Fill in the command line with: “SFTMIME.exe ADD SERVER:SERVERNAME /HOST HOSTNAME /TYPE RTSP /PORT 554 /REFRESH ON”
Next, tick the Package and browse to the second package created, which is the whole Microsoft Virtualization Client folder package.
After that, advertise the task sequence to perform OSD.


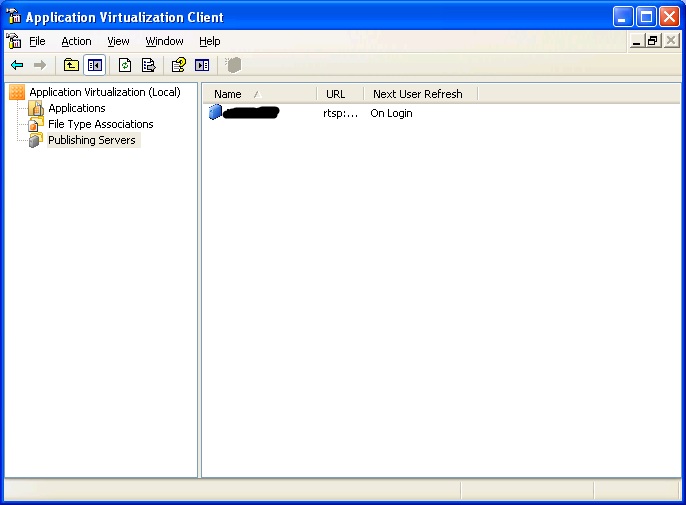
The task sequence should be succesfully deployed with App-V 4.6 Client succesfully installed and configured.
Discussion:
Note that there are differences on the “configure publishing server” variable in task sequence of Scenario 1 and Scenario 2. Notice that there is no package included in the task on Scenario 1. If the package on Scenario 2 is removed and perform deployment, the deployment will fail. The report will show error message like:
The solution is to add the entire Microsoft Application Virtualization Client folder to a new package and include in the “Configure Publishing Server” task.
As for the task on Scenario 1, no package is needed because the captured OS image is already installed with App-V 4.6 Client (the entire Microsoft Application Virtualization Client folder is already inside the image).
This discussion is only from my personal opinion, more proper explanation is welcome.
No comments:
Post a Comment